This Oil Barrage + Frost Wall build turns the shared Gemling Legionnaire core from Part 1 into a Talisman-based Wyvern shapeshift setup with the highest single-target ceiling in the series. If you haven’t built the shared foundation yet, start with Part 1 — the All-in-One Build Guide.
📌 1. Oil Barrage + Frost Wall Build Overview & Mechanics
1. Rend feeds Oil Barrage
-
 Rend
is this build’s free Wyvern-mode basic attack — it costs 0 Mana, so it can run constantly while moving between packs, and its hits alone are enough to build Power Charges. Whenever a Power Charge is available it consumes one to grant a 10-second buff that converts part of its damage to Lightning.
 Oil Barrage
is the actual damage skill: holding it down consumes Power Charges to switch from its normal Oil-spraying “Base” form into the “Empowered” channel, a sustained barrage of electrified projectiles that converts part of its damage to Lightning and can hit the same target repeatedly.
2. Frost Wall sets up the burst
-
 Frost Wall
is planted and then broken before engaging — this is the same skill the shared Part 1 core already uses as filler, just re-supported here with its own dedicated Cold-focused setup. Popping it first sets up the burst window this build opens with, before switching over to Rend and Oil Barrage for the rest of the fight.
3. Push toward 100% Critical Hit Chance
- Once the first hit of a channel lands as a Critical Hit, Critical Hits keep landing for the rest of that skill’s duration — so getting passive Critical Hit Chance high enough to guarantee that first hit crits (ideally to a full 100%) is one of the most important tuning goals for this variant. Gear and passive points alike should be weighed against how close they get you to that number.
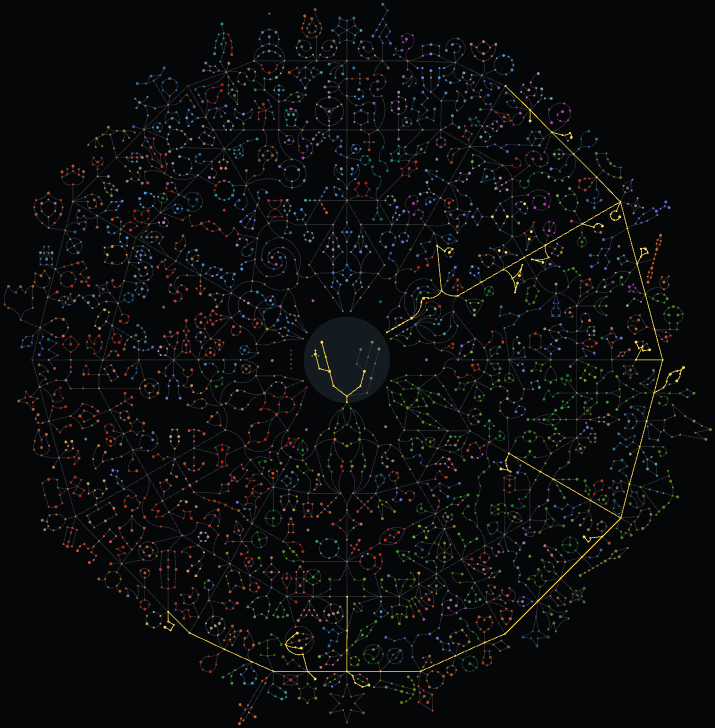
4. Passive tree: mana efficiency out, Critical Hit Chance in
- This build’s tree still carries the 3 “Mana Efficiency” passive points taken for the Bow variant (Part 4), but they aren’t needed here — Oil Barrage’s Empowered channel only spends its own Mana-per-second cost while actively held, and Rend is entirely free. Refund those 3 points and reinvest them into Critical Hit Chance nodes, working toward the 100% target from point 3 above. If gear alone can’t close the gap, drop a Critical Damage notable for more flat Critical Hit Chance nodes first, then fall back to smaller Critical Hit Chance nodes and Skill Speed nodes further down the tree.
5. Hunting routine
- Plant a Frost Wall
Frost Wall
See Section 4 for the full tooltip.
and break it for the opening Cold burst, then hold Rend to build Power Charges and light up its Lightning buff, and unload with Oil Barrage‘s Empowered channel to burn through the target. Because Rend’s basic attacks alone generate Charges, income stays fast even while just mapping between packs. Pop Pinnacle of Power off the secondary weapon set whenever Power Charges are full for a short window of massively amplified damage.
📊 2. Pros & Cons
Pros:
- Behemoth Clutches alone hands over +3 to Level of all Attack Skills, built-in Critical Hit Chance, Power Charge generation, and flat Lightning/Fire/Cold damage — a huge share of this build’s power comes from a single item.
- Rend costs 0 Mana and keeps generating Power Charges even while just moving between packs, so Oil Barrage’s Empowered channel is rarely starved for Charges to consume.
- Stacking a Frost Wall burst window on top of a sustained Oil Barrage channel gives this variant the highest single-target ceiling in the series.
Cons:
- Needs real passive investment toward 100% Critical Hit Chance for the crit-dependent buff uptime to stay consistent — under-geared characters will feel noticeably less reliable until that threshold is hit.
- Juggling three active skills in sequence (Frost Wall, Rend, Oil Barrage) is less “hold one button” than the Bow or mapping-focused Mace variants earlier in the series.
Want the screen-clearing ranged variant instead? Check out Part 4 — Stormcaller Arrow + Tornado Shot.
🎒 3. Gear & Gem Setup
Everything here — passives, ascendancy, and the Shared Jewels — is identical to the core build in Part 1. Only the weapon (into a Talisman) and the Gloves/Amulet pair (into the Melee-skill-level version, same as Part 3) change for this Oil Barrage variant.
Core Unique Items:
- Behemoth Clutches (Maji Talisman) — the signature item here: +3 to Level of all Attack Skills, +4.99% Critical Hit Chance, 24% increased Attack Speed, a 50% chance to gain an additional Power Charge whenever you gain one (plus an 8% chance at an additional random Charge on any Charge gain), 5% of Damage gained as Extra Damage of all Elements, 30% increased Magnitude of Shock inflicted, and flat Lightning/Fire/Cold damage on top. It also comes with all 3 of its Rune sockets already filled — Saqawal’s Rune of the Sky (the same one needed for the shared weapon-swap trick), Xopec’s Soul Core of Power, and a Perfect Storm Rune.
Gear by Slot (changes from Part 1):
- Weapon: Behemoth Clutches (Maji Talisman) — replaces the Mace/Bow weapons used in the other variants.
- Gloves: swap to the Melee-skill-level pair, same as Part 3 — the same jewel socket carrying the shared combat jewel, with “+2 to Level of all Melee Skills” covering Rend (this build’s Wyvern strike).
- Amulet: same fractured recipe as Part 1 (Spirit locked into one prefix, Max Runic Ward as the other, Quality of all Skills as a fixed line), with “+4 to Level of all Melee Skills” instead of Projectile — same swap as Part 3.
🔮 4. Full Skill List
The complete skill and support gem setup for this Oil Barrage build.
-
Rend
Rend
Attack
Shapeshift into a Wyvern and perform a wide slash with your wingtip claws. Consumes a Power Charge if possible to grant you a Buff that gives you extra Lightning damage. While you have the Buff, Rend covers a much larger area but is slower.
Normal StrikesBuff duration is 10 seconds
Buff grants 50% of damage gained as Lightning
Additional Effects From Quality:Buff grants (0–10)% of damage gained as Lightning
Lightning-Charged—Attack Damage: (130–405)%
20% less Attack Speed
150% more Area of Effect
 Rakiata’s Flow
Support, Lineage
Supports Skills that can cause Damaging Hits, causing those Hits to treat Enemy Elemental Resistances as inverted.
, Living Lightning II,
 Ailith’s Chimes
Support, Lineage
, Verglas — your free basic attack; holding it builds Power Charges and Combo even while just moving between packs, feeding both the Lightning buff and Oil Barrage’s Charge consumption.
-
Oil Barrage
Oil Barrage
Attack
Shapeshift into a Wyvern and spit Oil at enemies, creating Oil Ground where the Projectiles land. Consumes Power Charges if possible to instead Channel a sustained barrage of electrified Oil that does not create Oil Ground. Projectiles are fired in sequence, allowing multiple Projectiles to Hit the same target.
BaseFires 3 Projectiles
Oil Slows enemy movement speed by 20%
Oil applies Exposure, lowering Total Elemental Resistances by 20%
Oil spray radius is 2.1 metres
Oil Duration is 6 seconds
Channelling ends after one group of Projectiles
Additional Effects From Quality:Exposure lowers Total Elemental Resistances by an additional (0–5)%
(0–20)% chance to not remove Charges on useOil GroundConverts 100% of Physical damage to Fire damage
Once Ignited, Oil Ground adds 100% of this Attack’s Fire Damage as unscalable damage to the Ignite
Oil Slows enemy movement speed by 20%
Oil applies Exposure, lowering Total Elemental Resistances by 20%
Oil Ground radius is 2.1 metres
Oil Ground Duration is 6 seconds
Empowered—Attack Damage: (100–312)%
Converts 40% of Physical damage to Lightning damage
Fires 3 Projectiles
Oil Slows enemy movement speed by 20%
Oil applies Exposure, lowering Total Elemental Resistances by 20%
Impact radius is 2.1 metres
Oil duration is 6 seconds
Consumes a Power Charge every 1.5 seconds to continue Channelling
 Pinpoint Critical,
 Salvo,
 Nova Projectiles I,
 Ricochet II, Verglas — your main damage skill; the Empowered channel is what actually kills bosses once Power Charges are available to fuel it.
-
Frost Wall
Frost Wall
Spell
Create a wall of Ice Crystals which holds back enemies. The Crystals explode if sufficiently damaged, or if pushed hard enough, damaging nearby enemies. Consumes a Lightning Infusion if possible to add another Lightning explosion if destroyed.
Frost WallDeals (7–187) to (11–280) Cold Damage
50% more Magnitude of Chill inflicted
50% more Freeze Buildup
% more Area of Effect if Shattered
% more damage if Shattered
80% less damage if destroyed within 0.5 seconds by something other than you
Explosion radius is 2 metres
Ice Crystal duration is 8 seconds
Ice Crystals have (36–12714) maximum Life
Wall is (2.8–5.6) metres long
Additional Effects From Quality:(0–20)% increased Cooldown Recovery Rate
(0–400)% increased Ice Crystal LifeLightning-Infused—Critical Hit Chance: 9.00%
Deals (1–23) to (17–444) Lightning Damage
50% more Magnitude of Chill inflicted
% more Area of Effect if Shattered
% more damage if Shattered
Explosion radius is 2.8 metres
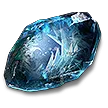 Glacier,
 Cold Mastery,
 Rapid Casting II,
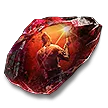 Efficiency II,
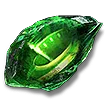 Cooldown Recovery II — plant and break it first for the opening Cold burst before switching to Rend and Oil Barrage.
🔗 5. Credits & Build Planner
Where this Oil Barrage build came from, and where to see it in action.
- Build Creator: 대길이겨란-게임채널
- 대길이겨란 YouTube Channel: 대길이겨란-게임채널
- Current Character (poe.ninja): Level 98 Gemling Legionnaire – Path of Exile 2 – poe.ninja
💬 6. Author’s Notes
- Investment & Time Cost: Shares the same core gear as Part 1 — just a Talisman (Behemoth Clutches) in place of a weapon, a Melee-skill-level Gloves/Amulet pair (same swap as Part 3), and a passive respec of 3 Mana Efficiency points into Critical Hit Chance nodes.
- In-Game Performance: The highest single-target ceiling of the four variants — a Frost Wall burst window followed by a sustained Oil Barrage channel, fed by Rend’s free, always-on Power Charge generation.
- Survivability & Room to Upgrade: The main tuning knob is Critical Hit Chance — push passives and gear toward 100% so the crit-dependent buff uptime stays consistent rather than falling off mid-fight.
This Oil Barrage build guide is based on personal testing and setup of the character, closely following the build showcased by 대길이겨란-게임채널 and referencing his character profile on poe.ninja.